Sunny Daisy Coaster — Free Crochet Pattern
What makes it special
Made with Love
A sunny daisy coaster with 10 petals, textured center, and tidy backing—perfect for gifts and summer tablescapes.
Approx Time
Most crocheters will finish one coaster in 2–3 hours. If you make a set of four, allow 6–8 hours total. Time depends on yarn, hook size and whether you add a backing or stiffener.
Beginner Friendly Level
Designed for confident beginners: you should be comfortable making a magic ring, working continuous rounds, doing increases and decreases (sc2tog). No complicated shaping or advanced stitches required. Petals introduce gentle shaping for practice with decreases.
About This Sunny Daisy Coaster — Free Crochet Pattern
A cheerful, easy-to-make crochet daisy coaster that brightens any tabletop. This pattern includes a textured seed center, layered petals, a sturdy backing and a neat border so your coaster lies flat and looks polished from both sides. It’s a fast, satisfying project for beginners who know basic single crochet and increases/decreases, and an ideal stash-busting pattern for colorful cotton yarn.
I designed the Sunny Daisy Coaster to be a quick, joyful crochet project that produces a functional piece with a polished, layered look. The pattern builds from the textured seed center outward to create a plump central disk, then adds individually crocheted petals anchored around that center for a delicate, 3D flower. A separate backing piece gives the coaster structure and a neat underside; a simple border unifies the layers and prevents ruffling.
You’ll learn how to increase evenly in rounds, shape petals with decreases, and sew multiple thread-thin pieces together for a professional finish.
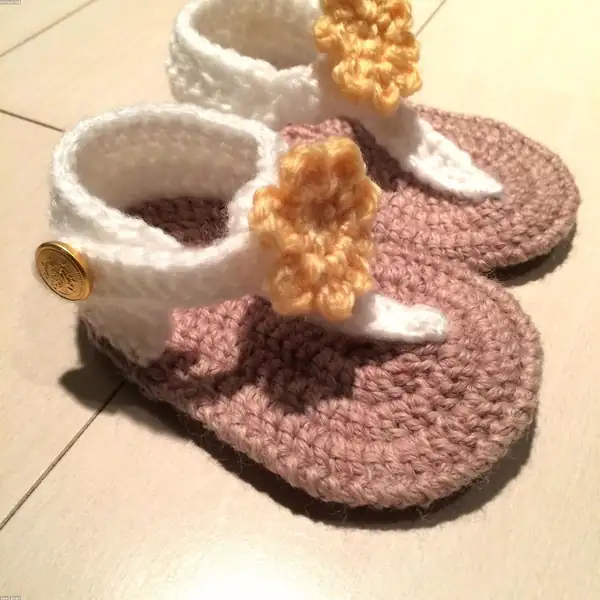
This pattern uses basic single crochet construction throughout, so it’s ideal if you’re just expanding beyond flat granny-square projects. Because petals are worked as small rounds and sewn down, you have full control over petal placement and spacing—perfect for customizing the design. Use absorbent cotton to make these actual coasters, or try acrylic/merino blends for decorative mats.
The pattern includes optional simple tufting instructions if you want a more textured center.
Why You'll Love This Sunny Daisy Coaster — Free Crochet Pattern
You’ll love this pattern because it’s fast to work up, uses a minimal set of stitches, and results in a bright, cheerful coaster that looks more complex than it is. The modular construction means you can change petal count, colors and sizes easily. It’s a perfect gift: make a set in coordinated colors, or work a whole placemat by making and joining several daisies.
The finished coaster is sturdy, lays flat, and has a lovely hand when worked in 100% cotton.
Switch Things Up
Make the coaster larger by increasing the number of petals or working additional rounds on the backing and border. Use thicker yarn and a larger hook for a chunkier coaster, or finer thread for a delicate doily. Change petal count (8–12) to vary the look, or join two flowers together to make a placemat.
Common Mistakes & How to Fix Them
Abbreviations
-
01SC — single crochet:
-
02INC — increase (2 SC in same stitch):
-
03DEC — decrease (single crochet two together / sc2tog):
-
04MR — magic ring:
-
05BLO — back loop only:
-
06SLST — slip stitch:
-
07CH — chain:
-
08() — number in parentheses is the total stitches at the end of the round:
Sunny Daisy Coaster — Free Crochet Pattern
Free crochet pattern for a sunny daisy coaster with petal-by-petal assembly. Beginner-friendly, quick to work and customizable. Includes backing and border for a flat, durable coaster.
- Skill level
- Beginner Friendly
- Time to make
- 2-3 hours
Materials Needed
Tap an item to tick it off your stash — the list resets when you leave the page.
-
01I used 100% cotton DK (light worsted) in three colors: sunny yellow for the seed, bright white for the petals, and soft green for the border and leaves. Cotton gives the best absorbency and a crisp stitch definition.
-
02If you prefer a softer coaster for decor, choose a cotton-blend or fingering-weight yarn and work with the next smaller hook to maintain density.
-
03For a sturdier coaster try a heavier cotton (worsted weight) and a 4.5 mm hook—this will create a thicker, more protective mat for hot mugs.
-
013.5 mm crochet hook (or size recommended on your yarn label). Use a slightly smaller hook if you want a denser coaster.
-
02Stitch marker to mark the start of rounds while working in continuous spiral.
-
03Tapestry needle for sewing petals, weaving in ends and attaching the backing and border.
-
04Scissors.
-
05Optional: small amount of toy stuffing for the tufted center if you want a raised middle (not necessary for a functional coaster).
The Pattern, Round by Round
Tap a row when you finish its round — the red thread keeps your place.
Seed Center (make 1) — color: sunny yellow
6 SC in magic ring (6)
(INC) x6 — 6 INC = 12 (12)
(1 SC, INC) x6 — 6 SC + 6 INC = 18 (18)
(2 SC, INC) x6 — 12 SC + 6 INC = 24 (24)
(3 SC, INC) x6 — 18 SC + 6 INC = 30 (30)
(4 SC, INC) x6 — 24 SC + 6 INC = 36 (36)
(5 SC, INC) x6 — 30 SC + 6 INC = 42 (42)
(6 SC, INC) x6 — 36 SC + 6 INC = 48 (48)
48 SC around — keep even tension (48)
BLO 48 SC around (48). Fasten off and leave a long tail for sewing (48)
Petal (make 10) — color: bright white
6 SC in magic ring (6)
(INC) x6 — 6 INC = 12 (12)
(1 SC, INC) x6 = 18 (18)
(2 SC, INC) x6 = 24 (24)
(3 SC, INC) x6 = 30 (30)
30 SC — even round to build length (30)
(3 SC, DEC) x6 — 24 (24)
(2 SC, DEC) x6 — 18 (18)
(1 SC, DEC) x6 — 12 (12)
(DEC) x6 — 6 (6)
6 SC — tidy the tip of the petal (6)
Slip stitch to first stitch, fasten off leaving a long tail for sewing (6)
Backing Disk (make 1) — color: soft beige or matching yellow
6 SC in magic ring (6)
(INC) x6 = 12 (12)
(1 SC, INC) x6 = 18 (18)
(2 SC, INC) x6 = 24 (24)
(3 SC, INC) x6 = 30 (30)
(4 SC, INC) x6 = 36 (36)
(5 SC, INC) x6 = 42 (42)
42 SC around — make this round smooth for a flat base (42)
(5 SC, DEC) x6 — 36 (36)
(4 SC, DEC) x6 — 30 (30)
30 SC — final smoothing round (30)
Slip stitch to join, fasten off and leave a tail to sew to the flower layers (30)
Outer Border Band (make 1) — color: contrasting (e.g., soft green)
Chain 18, join to form a loop, 18 SC into chain (18)
(2 SC, INC) x6 — 18 + 6 = 24 (24)
(3 SC, INC) x6 — 24 + 6 = 30 (30)
30 SC around (30)
(4 SC, INC) x6 — 36 (36)
(5 SC, INC) x6 — 42 (42)
42 SC around — check that this band matches the assembled flower diameter (42)
Slip stitch to join, fasten off leaving a tail to sew around the edge (42)
Leaf (make 2) — color: fresh green
6 SC in magic ring (6)
(INC) x6 = 12 (12)
(1 SC, INC) x6 = 18 (18)
(2 SC, INC) x6 = 24 (24)
24 SC around — shape the leaf width here (24)
(3 SC, DEC) x6 — 18 (18)
(2 SC, DEC) x6 — 12 (12)
(1 SC, DEC) x6, slip stitch, fasten off and leave a tail for sewing (6)
Hanging Loop / Stem (make 1) — color: green or matching
Chain 20, join with slip stitch to form a loop, 20 SC into chain (20)
20 SC around (20)
(4 SC, DEC) x4 — 20 - 4 = 16 (16)
Slip stitch to join, fasten off and leave a long tail for attaching (16)
Tufted Center Accent (optional) — color: goldenrod
6 SC in magic ring (6)
(INC) x6 = 12 (12)
BLO 12 SC (12)
(1 SC, INC) x6 = 18 (18)
18 SC — if you prefer a puffed center, leave slightly stuffed before sewing (18)
Slip stitch to join, fasten off and leave tail for attaching (18)
Assembly Instructions
- Prep: Block pieces lightly if using cotton to flatten rounds and make sewing easier.
- Center placement: With the seed center flat (yellow side up), mark 10 equal positions around the edge with removable stitch markers or safety pins. These marks are where petals will be sewn.
- Sew petals: Place each petal over a marked position with the tip pointing outward. Using the long tail from each petal, whipstitch or mattress stitch the petal base to the edge of the seed center. Keep stitches small and close together so petals sit snugly.
- Optional tuft: If using the tufted accent, stitch it centered on top of the seed, tacking it in place at 6–8 points so it won’t shift with use.
- Attach backing: Center the backing disk under the flower (wrong side down) and stitch through both layers around the inner circle to anchor. Use a running stitch or whipstitch, keeping tension even so the coaster remains flat.
- Sew on outer border: Align the border band around the assembled flower edge and use the long tail from the border to sew it in place, hiding petal joins and creating a clean rim.
- Add leaves and loop: Sew leaves to the underside or side as desired. Attach the hanging loop to one side between petals and backing if you want to hang the coaster when not in use.
- Finish: Weave in all ends on the underside. If desired, apply a light fabric stiffener or starch to the underside only for extra stability; avoid coating the top to preserve absorbency.
Important Notes
- All rounds are worked in continuous spiral unless a join is specifically called for. Use a stitch marker to track the beginning of each round.
- Petals are worked separately and sewn onto the seeded center; do not attempt to join petals in-round unless you are comfortable with advanced joining techniques.
- Keep tension consistent. If your petals or border flare or cup, adjust hook size down one increment to tighten your gauge.
- Cotton will stretch slightly when wet—this pattern assumes a dry, lightly blocked finish. If you plan to launder your coaster frequently, test a swatch to confirm stability.
- Counts in parentheses denote the total stitches at the end of that round—use them to check your work as you go.
Assemble the daisy by sewing petals evenly around the seed center, then stitch the backing to the underside. Add the outer border to hide seams and give the coaster a finished edge. Optionally add leaves and a hanging loop for decorative use.
Frequently Asked Questions
Yes. If you switch to worsted weight, use a larger hook (e.g., 4.5–5.5 mm) and expect the finished coaster to be thicker and slightly larger. Work one petal and the seed as a sample to see if the diameter and petal spacing suit your needs before making the full project.
This pattern uses 10 petals for a balanced look, but you can make anywhere from 8 to 12. If you increase petal count, consider decreasing the outer border size or adding more rounds to the backing so the edge still covers seams neatly.
Stuffing is optional. The tufted center can be left unstuffed for a flat coaster, or stuffed very lightly with a small amount of fiberfill for a raised center. Avoid heavy stuffing as it interferes with lying flat.
Block the coaster to shape it after washing. Use a warm iron with a damp cloth or pin it to shape while drying. Stiffening the underside lightly with a craft stiffener can help, but avoid coating the top surface to maintain absorbency.
Absolutely. Work several daisies and join them side-by-side with whipstitch or single crochet seam. Consider making a subtle border around the joined motifs to unify the placemat.
Mark the center’s edge at equal intervals—count the total edge stitches (Round 9 or 10 of the seed center) and divide by the number of petals you plan to attach. For 10 petals on a 48-stitch round, mark every 4–5 stitches depending on desired spacing.