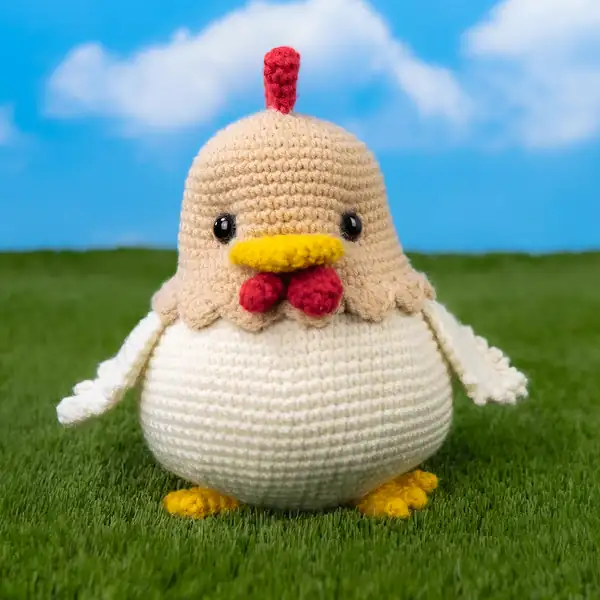
Sunny the Chicken — Free Amigurumi Crochet Pattern
What makes it special
Made with Love
Sunny is a round-bodied, slightly stylized chicken with soft curves and bold facial features — perfect for gifting, displaying or turning into a keychain by swapping out yarn for thinner materials. The design uses repeatable motifs so you can adjust size by changing yarn/hook. I recommend using worsted (medium) weight yarn and a 3.5–4.0 mm hook for a dense fabric.
Estimated Time
About 6–9 hours total for an experienced beginner. If you’re new to amigurumi, allow more time the first time you make Sunny — working slowly and stuffing evenly will make the finished chicken look its best.
Beginner Friendly Level
This is a beginner-friendly amigurumi pattern — you should be comfortable working in rounds, making increases and decreases, and sewing small pieces together. I give detailed instructions and tips for shaping so you can succeed even if you’re relatively new to amigurumi.
About This Sunny the Chicken — Free Amigurumi Crochet Pattern
Meet Sunny, a cheerful little amigurumi chicken with a plump body, flappy wings and a jaunty comb. This beginner-friendly pattern uses basic single crochet shaping and simple pieces that sew together quickly. The finished chicken stands about 6–7 inches tall (depending on yarn and hook) and makes a perfect gift, spring decoration or mindful crochet break.
I designed this pattern to be easy to follow, with clear round-by-round stitch counts and assembly tips so you can finish a friendly farmyard friend in a weekend.
This pattern is written in US crochet terms and includes a detailed materials list, stitch abbreviations, round-by-round instructions for each piece, and step-by-step assembly notes. I carefully add stitch counts at the end of each round (in parentheses) so you can check your work as you go. Each piece begins with a magic ring (or foundation chain when noted) and ends with a final round and fastening off instruction so you can get straight to sewing.
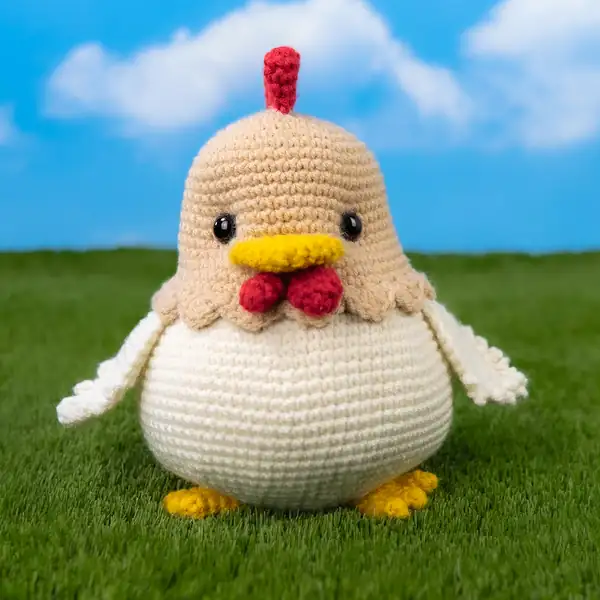
I recommend stuffing pieces firmly for structure (but not overstuffing), using safety eyes (or embroidered eyes for baby-safe toys), and checking your gauge and tension. This pattern is intentionally modular: change colors for a different chicken personality, or make a family by scaling yarn and hook.
Why You'll Love This Sunny the Chicken — Free Amigurumi Crochet Pattern
You’ll love this pattern because it: creates a lovable, compact amigurumi that finishes quickly; uses simple, repeatable rounds for consistent shaping; provides clear assembly instructions; and lets you customize color, size and expression easily.
Switch Things Up
Change the body color for a speckled hen (use variegated yarn) or a golden rooster (brighter comb and tail). Use bulky yarn and a larger hook to make a chunky decorative chicken, or use fingering yarn and a smaller hook to make a tiny keychain version.
Common Mistakes & How to Fix Them
Abbreviations
-
01MR — magic ring:
-
02SC — single crochet:
-
03INC — increase (2 SC in same stitch):
-
04DEC — single crochet decrease (sc2tog):
-
05ST(S) — stitch(es):
-
06CH — chain:
-
07SL ST — slip stitch:
-
08BLO/FLO — back/front loop only (used only when specified):
-
09RND — round:
Sunny the Chicken — Free Amigurumi Crochet Pattern
A friendly, compact amigurumi chicken pattern that’s perfect for beginner crocheters. Detailed rounds with stitch counts make shaping easy. Includes head, body, wings, comb, beak, wattle, legs, tail and feet with clear assembly instructions and finishing tips.
- Skill level
- Beginner Friendly
- Time to make
- 6-9 hours
Materials Needed
Tap an item to tick it off your stash — the list resets when you leave the page.
-
01Worsted weight (medium/4) acrylic or cotton yarn — main body color (e.g., warm cream or pale yellow), contrast colors: orange (beak/feet), red (comb/wattle), optional secondary color for wings or tail
-
02Small amounts of black for embroidered eyes if not using safety eyes
-
013.5 mm (E) crochet hook (or hook appropriate to your tension and yarn)
-
02Yarn needle for sewing pieces together and weaving in ends
-
03Polyester stuffing
-
04Safety eyes (6–8 mm) or black yarn for embroidered eyes
-
05Stitch marker (to mark the start of your round)
-
06Scissors
-
07Pins for positioning pieces before sewing
The Pattern, Round by Round
Tap a row when you finish its round — the red thread keeps your place.
Head
6 SC in magic ring (6)
INC in each st around (12)
(1 SC, INC) x6 (18)
(2 SC, INC) x6 (24)
(3 SC, INC) x6 (30)
(4 SC, INC) x6 (36)
SC around (36)
SC around (36)
SC around (36)
SC around (36)
SC around (36)
SC around (36)
(4 SC, DEC) x6 (30)
(3 SC, DEC) x6 (24)
(2 SC, DEC) x6 (18)
(1 SC, DEC) x6 (12)
DEC x6 (6) — stuff head firmly through the opening
SC around (6). Fasten off and leave a long tail for sewing (6)
Body
6 SC in magic ring (6)
INC in each st around (12)
(1 SC, INC) x6 (18)
(2 SC, INC) x6 (24)
(3 SC, INC) x6 (30)
(4 SC, INC) x6 (36)
(5 SC, INC) x6 (42)
(6 SC, INC) x6 (48)
SC around (48)
SC around (48)
SC around (48)
SC around (48)
SC around (48)
SC around (48)
SC around (48)
SC around (48)
(6 SC, DEC) x6 (42)
(5 SC, DEC) x6 (36)
(4 SC, DEC) x6 (30)
(3 SC, DEC) x6 (24)
(2 SC, DEC) x6 (18)
(1 SC, DEC) x6 (12)
DEC x6 (6) — stuff the body firmly but leave room at top to sew head
SC around (6)
SC around (6)
SC around (6). Fasten off and leave a long tail for joining to head (6)
Wings (make 2)
6 SC in magic ring (6)
INC in each st around (12)
(1 SC, INC) x6 (18)
(2 SC, INC) x6 (24)
(3 SC, INC) x6 (30)
SC around (30)
SC around (30)
SC around (30)
(3 SC, DEC) x6 (24)
(2 SC, DEC) x6 (18). Fasten off and leave a tail for sewing (18)
Beak
6 SC in magic ring (6)
INC in each st around (12)
(1 SC, INC) x6 (18)
SC around (18)
DEC x6 (6). Fasten off and leave a short tail for sewing to head (6)
Comb
6 SC in magic ring (6)
INC in each st around (12)
(1 SC, INC) x6 (18)
(2 SC, INC) x6 (24)
(SC, INC, INC) x6 (30) — this creates ruffly points
SC around (30). Fasten off and leave a long tail for sewing along head seam (30)
Wattle
6 SC in magic ring (6)
INC in each st around (12)
(1 SC, INC) x6 (18)
SC around (18)
DEC x6 (6). Fasten off and leave a tail for sewing under the beak (6)
Legs (make 2)
6 SC in magic ring (6)
INC in each st around (12)
SC around (12)
SC around (12)
(3 SC, INC) x3 (12)
SC around (12). Fasten off and leave a long tail for sewing to the body (12)
Tail
6 SC in magic ring (6)
INC in each st around (12)
(1 SC, INC) x6 (18)
(2 SC, INC) x6 (24)
SC around (24)
SC around (24). Fasten off and leave a tail for sewing at the back of the body (24)
Feet (make 2)
6 SC in magic ring (6)
INC in each st around (12)
SC around (12)
(2 SC, DEC) x3 (9)
(1 SC, DEC) x3 (6)
SC around (6). Fasten off and weave in ends; leave a tail if you want to sew the foot to the leg (6)
Assembly Instructions
- 1. Attach the head to the body: Position the head centered on top of the body. Use pins to match the center stitches and a yarn needle with the long tail to mattress stitch around, pulling snugly so no gap remains.
- 2. Sew on the comb: Center the comb on the top-front of the head. Use the long tail from the comb to stitch along the base. You can nourish the comb curve by folding slightly as you sew to create upright points.
- 3. Attach the beak and wattle: Sew the beak to the front center of the face. Place the wattle just below the beak and stitch into place so it hangs slightly forward.
- 4. Eyes: Insert safety eyes between rounds 6–8 of the head (approx.), about 6–8 stitches apart depending on preference. If embroidering eyes, use black yarn and a needle to stitch two small Xs or satin stitch eyes.
- 5. Attach wings: Position wings on either side of the body where the widest part begins (usually between body rounds 9–12). Sew the top edge of each wing to the body so the bottom can flap slightly.
- 6. Sew legs and feet: If you’ve made separate feet, sew each foot to the bottom of a leg, then attach legs to the underside of the body evenly spaced. If legs are sewn directly to the body, position them at the base so Sunny sits level.
- 7. Attach tail: Sew the tail to the back of the body a little below the widest point. Angle it slightly upward for a perky look.
- 8. Weave in ends: Tidy all tails by weaving them through adjacent stitches and trimming any excess. Double-check that all attachments are secure.
Important Notes
- Work in continuous rounds (spiral) unless otherwise specified. Use a stitch marker to keep track of the start of rounds.
- Counts shown at the end of each round are the resulting total stitches for that round — check your work against these numbers.
- Adjust hook size to achieve a firm fabric so stuffing does not show through.
- If making for a child under 3, replace safety eyes with embroidery to avoid small parts.
- You can slightly overstuff the head and body for a more squat, robust shape or under-stuff for a soft toy.
If you like Sunny, try making a matching egg or henhouse — change colors to create a family. I always attach the head to the body with mattress stitch for a neat seam and use embroidery for eyes if the toy is for a baby.
Frequently Asked Questions
I recommend worsted weight (medium/4) yarn with a 3.5 mm (E) hook for a firm fabric. If your stitches are loose and stuffing shows, drop down by a half or full hook size. For a smaller chicken, use lighter-weight yarn and a smaller hook.
Use a tight tension and a slightly smaller hook than you would for garments. Stuff as you go to maintain shape, and if necessary, close openings with a needle and yarn using an invisible decrease or ladder stitch.
Yes. Use thicker yarn and a larger hook to make a bigger chicken or thinner yarn and a smaller hook to make a keychain-sized bird. Keep in mind you may need to adjust stuffing and eye size.
Sew the base of the comb securely along the head seam, using small, tight stitches. You can also slip a small piece of craft wire or a short pipe cleaner into the comb before finishing (wrap it in a small yarn tube first) to give it extra structure.
Yes. To make flatter wings or tail feathers, work fewer increase rounds and then finish with a decorative edging (like crab stitch) to give them a finished rim. You can also crochet them as short rows for a feathered look.
Place safety eyes between head rounds 6–8, approximately 6–8 stitches apart depending on how wide or narrow you want the face to read. If unsure, pin the eyes first to check expression before locking them in place.